USB-Stick mit Raspbian "BOOT-RDP" aufsetzen
Aus www.electronic-man.randschtoischlotzer.de
Version vom 11. Juni 2017, 14:45 Uhr von Eman (Diskussion | Beiträge)
Inhaltsverzeichnis
- 1 Voraussetzungen
- 2 Vorbereitungen
- 3 Installation
- 4 Starten
- 5 Deutsche Tastatur in Pixel-Oberfläche einstellen
- 6 Installation der RDP-Software/Pakete
- 7 Deutsche Sprache einstellen
- 8 Zeitzone festlegen/einstellen
- 9 Hostname ändern:
- 10 Touchpad für Notebook einrichten (Synaptics)
- 11 SSH-Zugriff (Server) einrichten und einstellen
Voraussetzungen
- ein bootfähiger USB-Stick (bzw. eine SD-Karte) auf die das Raspian Image (1,29 GB) und eine "Persistent"-Partition passt um die gemachten Änderungen zu speichern. Z. B. 2 GB groß.
- ein IBM-kompatibler X86 PC oder Notebook, dessen Netzwerkkarte und Grafikkarte/-chipsatz (VGA) von Raspbian unterstützt wird. Das sollten momentan so ziemlich alle gängigen Geräte sein.
Vorbereitungen
BIOS einstellen:
- PC/Notebook starten
- Tasten F8 oder F12 oder 'Ent/Del oder Esc (je nach Hersteller) drücken um ins BIOS zu gelangen
- Im BIOS / UEFI-Bios die Bootreihenfolge so stellen, dass vom USB-Stick gebootet wird. Soll ein sehr "alter" PC verwendet werden, der kein direktes Booten von USB unterstützt, so kann Plop Boot Manager verwendet werden um zunächst von DVD/CD oder Diskette zu starten und dann von USB zu booten.
Software downloaden:
- zum Schreiben des Betriebssystems unter Windows wir ein Schreibwerkzeug benötigt:
- Betriebsystem downloaden:
Installation
Installation Win32 DiskImager
- Win32-Disk-Imager installieren:
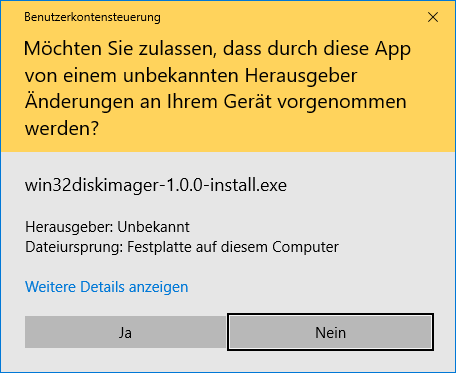
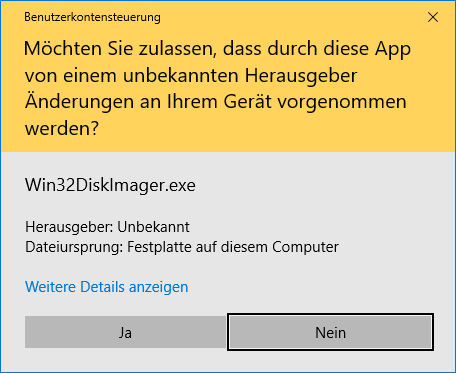
- Ja wählen.
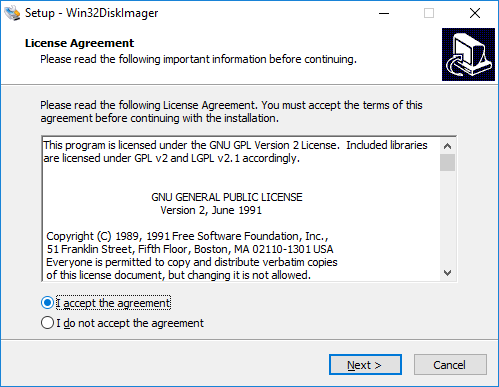
- "I accept the agreement" und Next > wählen.
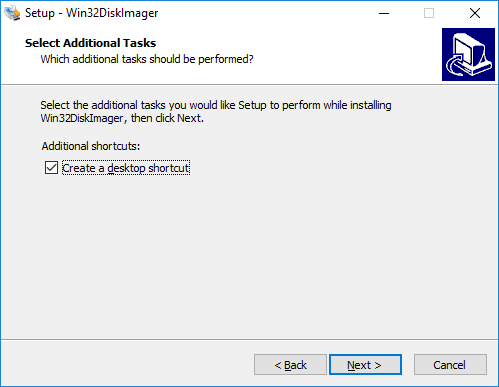
- Next > wählen.
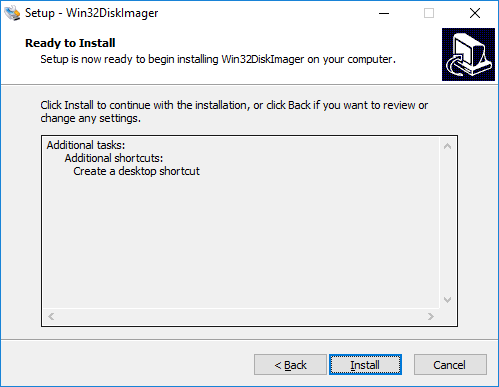
- Install wählen.
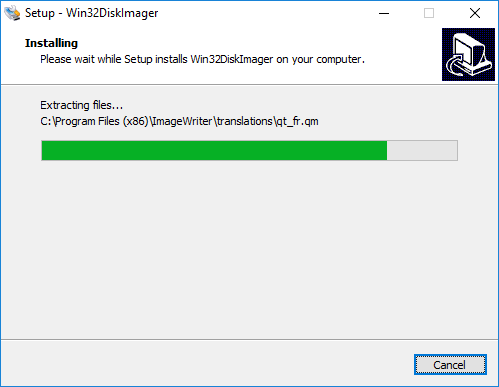
- warten...
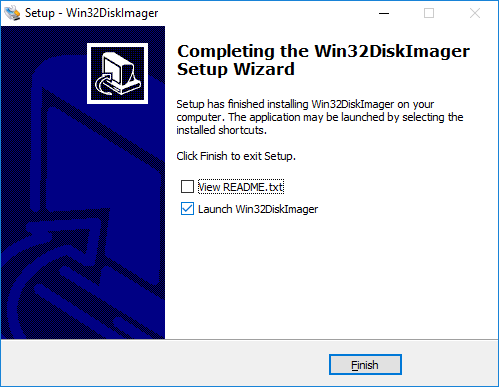
- Finish wählen.
Betriebsystem auf USB-Stick (SD-Karte) schreiben
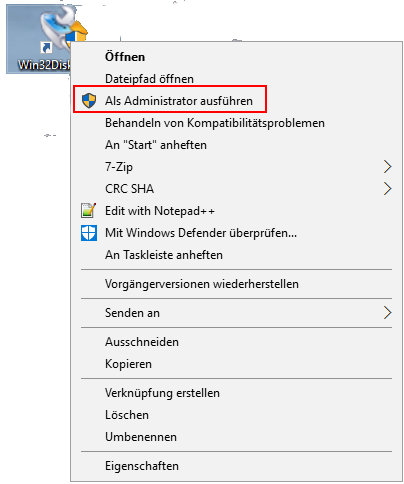
- Win32DiskImager mit Administratorrechten starten:
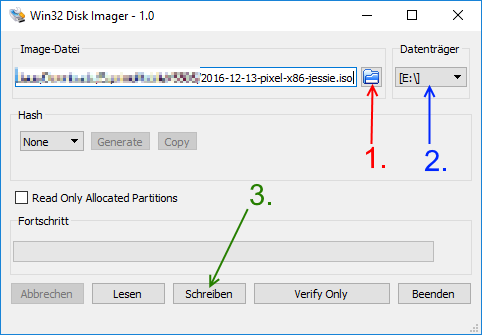
- zuvor gespeichertes Image über 1. auswählen.
- USB-Stick einstecken.
- über 2. den Laufwerksbuchstaben des USB-Sticks auswählen bzw. kontrollieren.
Hinweis: Im Dateidialog ist es erforderlich den Filter auf *.* einzustellen, da die Betriesystemdatei als .iso-Datei vorliegt:

- über 3. das Schreiben auf den USB-Stick starten.
- Yes wählen.
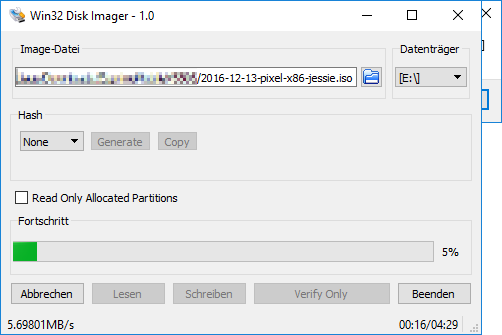
- warten ...
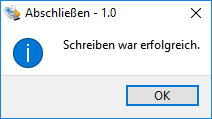
- OK wählen.
- Win32 Disk Imager über Beenden schliessen.
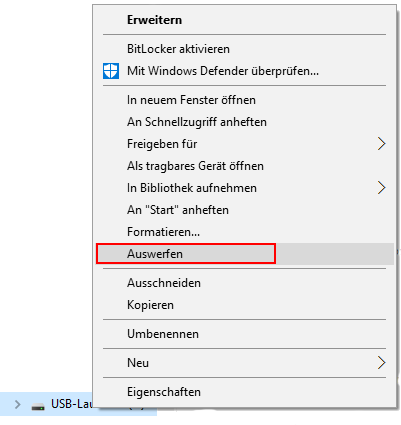
- USB-Stick über Auswerfen (im Windows-Explorer) am PC abmelden:
Starten
- USB-Stick an PC stecken
- Einschalten
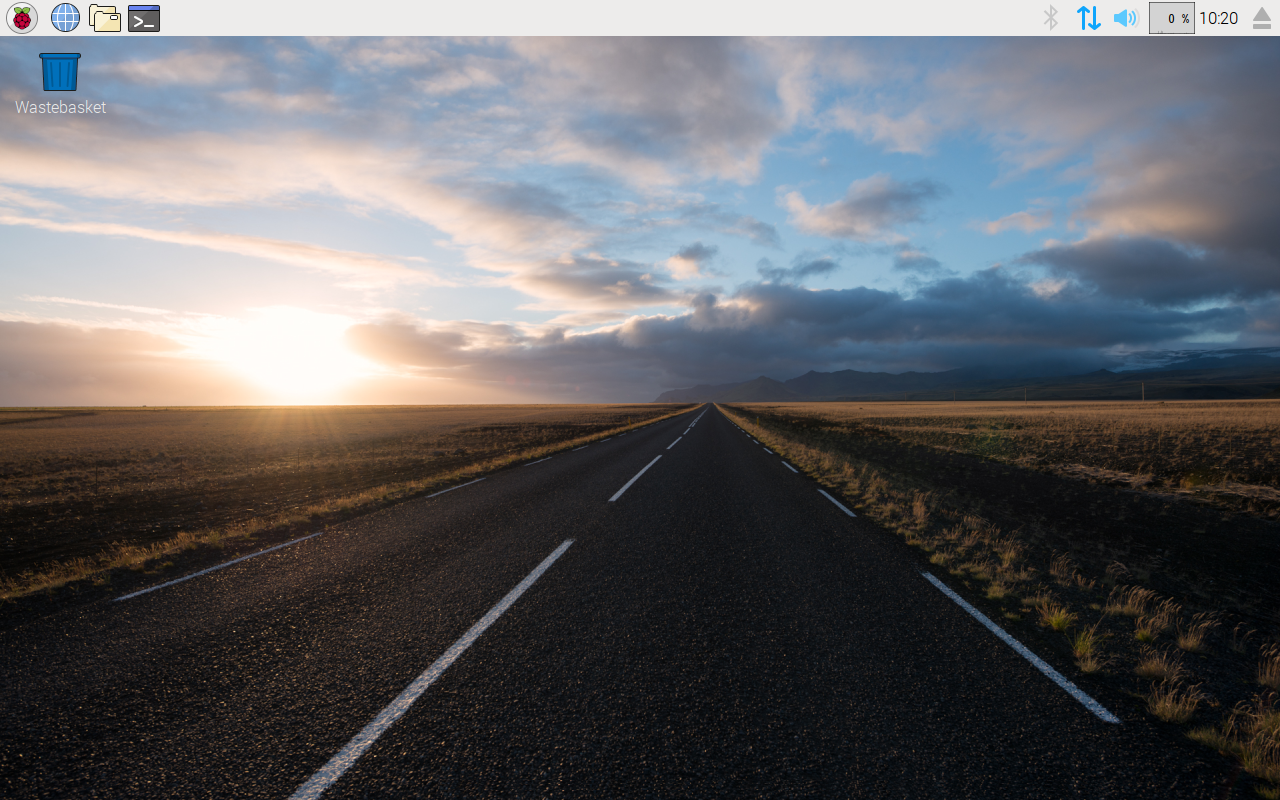
- Booten in den Pixel Desktop abwarten, bzw. "Run with persistence" auswählen:
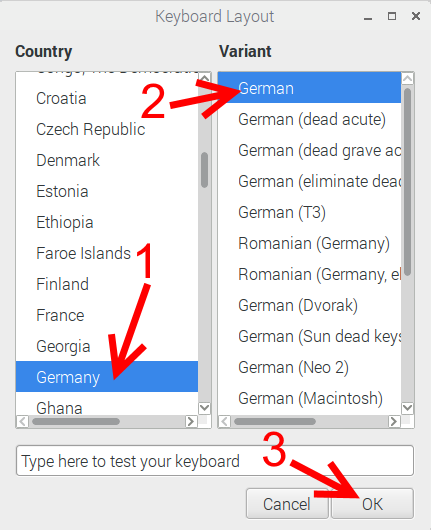
Deutsche Tastatur in Pixel-Oberfläche einstellen
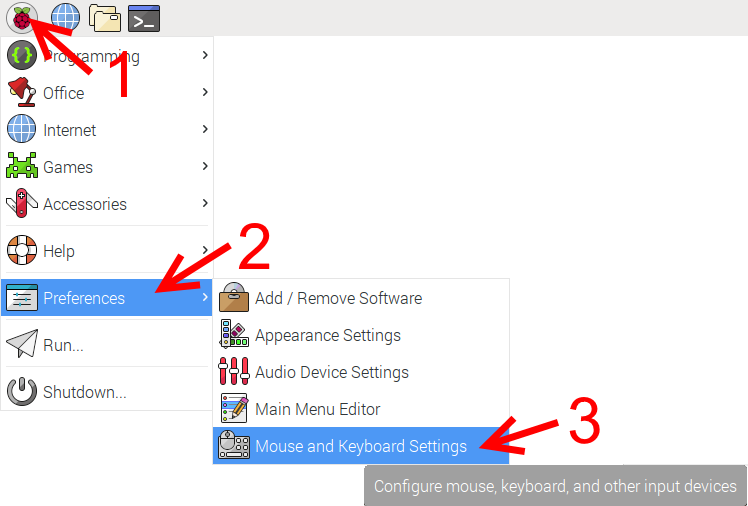
- 1. Raspberry wählen.
- 2. Preferences wählen.
- 3. Mouse and Keyboard Settings wählen,
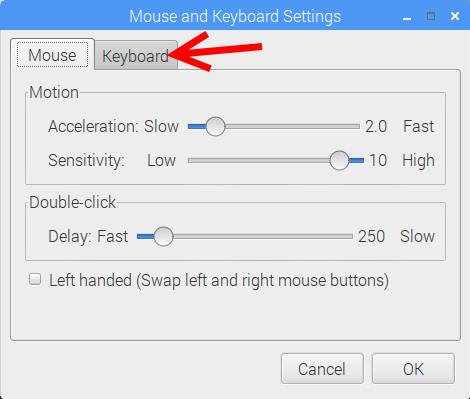
- Tab/Reiter Keyboard wählen.
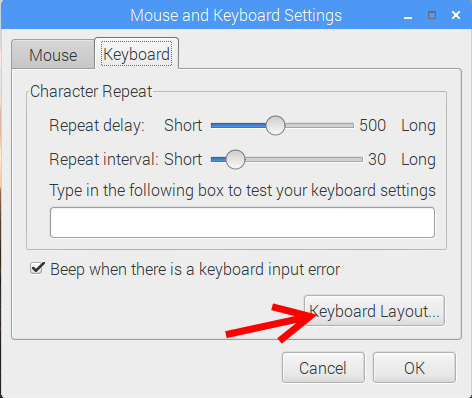
- Schaltfläche Keyboard Layout... wählen.
- 1. Country Germany wählen.
- 2. Variant German wählen.
- 3. OK wählen,
Installation der RDP-Software/Pakete
OS und Paketquellen auf den neuesten Stand bringen
- Terminal aufrufen:
- im Terminal/Befehlszeile folgendes eingeben:
sudo apt-get update
Pakete für RemoteDesktop und deutsche Sprache installieren:
sudo apt-get install task-german python-qt4 python-configparser python-urllib3 rdesktop -y
"Quellen" für RDP-GUI installieren:
cd ~
sudo git clone --recursive https://github.com/Gibbio/RDPGUI.git
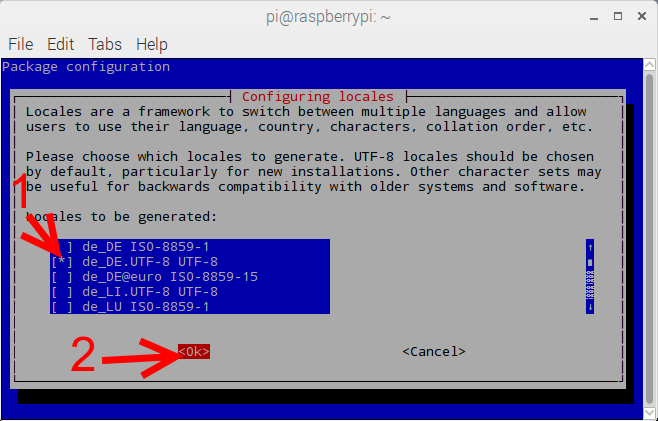
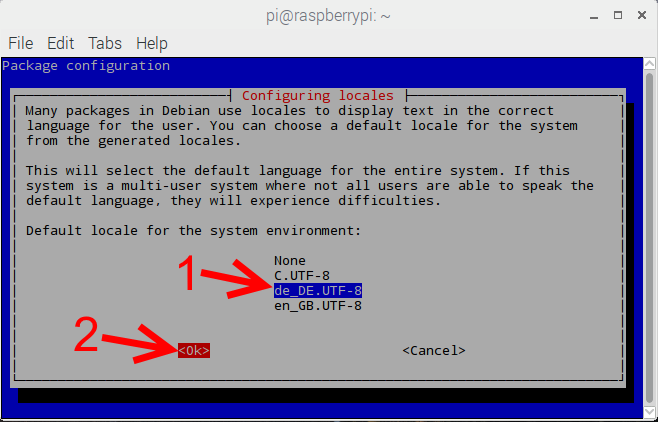
Deutsche Sprache einstellen
sudo dpkg-reconfigure locales
Zeitzone festlegen/einstellen
sudo cp /usr/share/zoneinfo/Europe/Berlin /etc/localtime
Hostname ändern:
sudo nano /etc/hostname
- Den Namen Raspberrypi überschreiben z. B.:
REQXYZ
Touchpad für Notebook einrichten (Synaptics)
- prüfen ob Touchpad "vorhanden"
egrep -i 'synap|alps|etps|elan' /proc/bus/input/devices
- Ausgabe sollte z. B. sein:
N: Name="SynPS/2 Synaptics Touchpad"
- Einstellungen (Schablone) kopieren:
sudo cp /usr/share/X11/xorg.conf.d/50-synaptics.conf /etc/X11/xorg.conf
- Einstellungen anpassen:
sudo nano /etc/X11/xorg.conf
- Einfügen/Abändern in:
# Example xorg.conf.d snippet that assigns the touchpad driver
# to all touchpads. See xorg.conf.d(5) for more information on
# InputClass.
# DO NOT EDIT THIS FILE, your distribution will likely overwrite
# it when updating. Copy (and rename) this file into
# /etc/X11/xorg.conf.d first.
# Additional options may be added in the form of
#   Option "OptionName" "value"
#
Section "InputClass"
        Identifier "touchpad catchall"
        Driver "synaptics"
        MatchIsTouchpad "on"
# This option is recommend on all Linux systems using evdev, but cannot be
# enabled by default. See the following link for details:
# http://who-t.blogspot.com/2010/11/how-to-ignore-configuration-errors.html
#       MatchDevicePath "/dev/input/event*"
        Option "TapButton1" "1"
        Option "TapButton2" "3"
        Option "TapButton3" "2"
EndSection

Section "InputClass"
        Identifier "touchpad ignore duplicates"
        MatchIsTouchpad "on"
        MatchOS "Linux"
        MatchDevicePath "/dev/input/mouse*"
        Option "Ignore" "on"
EndSection

# This option enables the bottom right corner to be a right button on clickpads
# and the right and middle top areas to be right / middle buttons on clickpads
# with a top button area.
# This option is only interpreted by clickpads.
Section "InputClass"
        Identifier "Default clickpad buttons"
        MatchDriver "synaptics"
        Option "SoftButtonAreas" "50% 0 82% 0 0 0 0 0"
        Option "SecondarySoftButtonAreas" "58% 0 0 15% 42% 58% 0 15%"
EndSection

# This option disables software buttons on Apple touchpads.
# This option is only interpreted by clickpads.
Section "InputClass"
        Identifier "Disable clickpad buttons on Apple touchpads"
        MatchProduct "Apple|bcm5974"
        MatchDriver "synaptics"
        Option "SoftButtonAreas" "0 0 0 0 0 0 0 0"
EndSection
