USB-Boot-Stick für Inventarisierung erstellen: Unterschied zwischen den Versionen
Aus www.electronic-man.randschtoischlotzer.de
Eman (Diskussion | Beiträge) (→SSH einrichten) |
Eman (Diskussion | Beiträge) K (→Raspberry-Pi-Konfiguration) |
||
| Zeile 43: | Zeile 43: | ||
*Himbeere -> Einstellungen.. -> Raspberry-Pi->Konfiguration -> Tab '''System''' | *Himbeere -> Einstellungen.. -> Raspberry-Pi->Konfiguration -> Tab '''System''' | ||
*Hostname von '''raspberrypi''' auf z. B. '''opsi-client''' einstellen. | *Hostname von '''raspberrypi''' auf z. B. '''opsi-client''' einstellen. | ||
| − | *Boot von '''Zum Desktop''' auf '''Zum | + | *Boot von '''Zum Desktop''' auf '''Zum CLI''' einstellen |
*Netzwerk beim Booten Haken bei '''Auf Netzwerk warten''' setzen | *Netzwerk beim Booten Haken bei '''Auf Netzwerk warten''' setzen | ||
*zum Tab '''Schnittstellen''' wechseln | *zum Tab '''Schnittstellen''' wechseln | ||
Version vom 11. Dezember 2018, 10:31 Uhr
Inhaltsverzeichnis
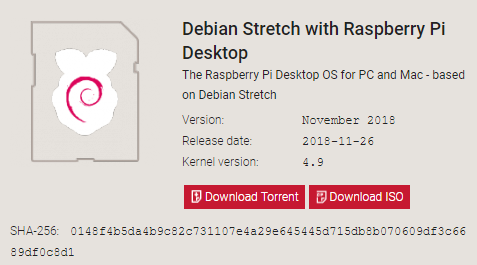
Raspberry Desktop x86 - Image downloaden
- www.raspberrypi.org -> Downloads -> Raspberry Pi Desktop (for PC and Mac) oder [1]
Image-Tool downloaden
- https://www.balena.io/etcher/ -> Download für Windows x64 -> Etcher for Windows x64 (64-bit) (Portable)
USB-Stick schreiben
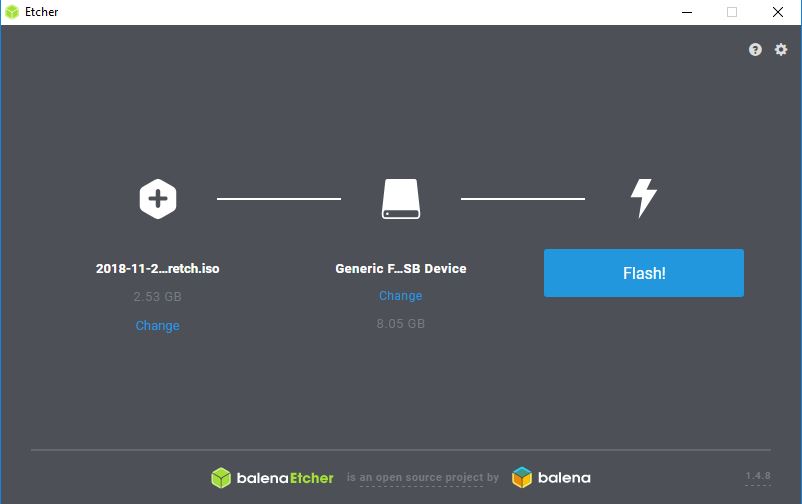
- mit dem Tool "Etcher" auf USB-Stick schreiben. Klick auf:
- Mit Change Image:
- und Stick (nach Laufwerksbuchstaben) auswählen - Achtung nicht Festplatte/SSD des Windows-OS!
Booten
- UEFI/Bios auf Kompatibilitäsmodus / Secure-Boot: aus einstellen (evtl. dazu ein Admin-Passwort vergeben + später wieder aufheben)
- Stick einstecken
- Taste F12 für Boot-Menü auswählen (wird meist mit einem Beep_ton bestätigt)
- Im "
Boot Menu / Application Menue den UEFI-Boot-Stick auswählen z. B. "<code>3. USB HDD: SMI USB DISK" - im Grub-Bootmanager "
*Run with persistence" auswählen
Einstellungen (Desktop) vornehmen
- im Begrüßungfester Schaltfläche Next klicken
- Country: Germany im Drop-Down-Menü wählen
- Language: German (wählen falls nicht schon eingestellt)
- Timezone: Berlin (wählen falls nicht schon eingestellt)
- Schaltfläche Next klicken
- Evtl. neues Kennwort vergeben
- Reboot
Raspberry-Pi-Konfiguration
- Himbeere -> Einstellungen.. -> Raspberry-Pi->Konfiguration -> Tab System
- Hostname von raspberrypi auf z. B. opsi-client einstellen.
- Boot von Zum Desktop auf Zum CLI einstellen
- Netzwerk beim Booten Haken bei Auf Netzwerk warten setzen
- zum Tab Schnittstellen wechseln
- SSH: Button auf Aktiviert setzen
- Schaltfläche OK klicken
- Schaltfläche Ja klicken um neu zu starten
SSH einrichten
- bestehende /etc/ssh/sshd.conf sichern:
sudo mv sshd_config sshd_config.original
- neue
sshd_configanlegen (Kopie von Raspberry Pi3-Raspian)
nano /etc/ssh/sshd_config
# Package generated configuration file
# See the sshd_config(5) manpage for details

# What ports, IPs and protocols we listen for
Port 22
# Use these options to restrict which interfaces/protocols sshd will bind to
#ListenAddress ::
#ListenAddress 0.0.0.0
Protocol 2
# HostKeys for protocol version 2
HostKey /etc/ssh/ssh_host_rsa_key
HostKey /etc/ssh/ssh_host_dsa_key
HostKey /etc/ssh/ssh_host_ecdsa_key
HostKey /etc/ssh/ssh_host_ed25519_key
#Privilege Separation is turned on for security
UsePrivilegeSeparation yes

# Lifetime and size of ephemeral version 1 server key
KeyRegenerationInterval 3600
ServerKeyBits 1024

# Logging
SyslogFacility AUTH
LogLevel INFO

# Authentication:
LoginGraceTime 120
PermitRootLogin without-password
StrictModes yes

RSAAuthentication yes
PubkeyAuthentication yes
#AuthorizedKeysFile     %h/.ssh/authorized_keys

# Don't read the user's ~/.rhosts and ~/.shosts files
IgnoreRhosts yes
# For this to work you will also need host keys in /etc/ssh_known_hosts
RhostsRSAAuthentication no
# similar for protocol version 2
HostbasedAuthentication no
# Uncomment if you don't trust ~/.ssh/known_hosts for RhostsRSAAuthentication
#IgnoreUserKnownHosts yes

# To enable empty passwords, change to yes (NOT RECOMMENDED)
PermitEmptyPasswords no

# Change to yes to enable challenge-response passwords (beware issues with
# some PAM modules and threads)
ChallengeResponseAuthentication no

# Change to no to disable tunnelled clear text passwords
#PasswordAuthentication yes

# Kerberos options
#KerberosAuthentication no
#KerberosGetAFSToken no
#KerberosOrLocalPasswd yes
#KerberosTicketCleanup yes

# GSSAPI options
#GSSAPIAuthentication no
#GSSAPICleanupCredentials yes

X11Forwarding yes
X11DisplayOffset 10
PrintMotd no
PrintLastLog yes
TCPKeepAlive yes
#UseLogin no

#MaxStartups 10:30:60
#Banner /etc/issue.net

# Allow client to pass locale environment variables
AcceptEnv LANG LC_*

Subsystem sftp /usr/lib/openssh/sftp-server

# Set this to 'yes' to enable PAM authentication, account processing,
# and session processing. If this is enabled, PAM authentication will
# be allowed through the ChallengeResponseAuthentication and
# PasswordAuthentication.  Depending on your PAM configuration,
# PAM authentication via ChallengeResponseAuthentication may bypass
# the setting of "PermitRootLogin without-password".
# If you just want the PAM account and session checks to run without
# PAM authentication, then enable this but set PasswordAuthentication
# and ChallengeResponseAuthentication to 'no'.
UsePAM yes
- Alternativ (Kopie von existierender Raspberry Pi3-Raspian-Datei)
sudo scp pi@192.168.178.4:/etc/ssh/sshd_config /etc/ssh/sshd_config
- Reboot


